- Not what you were looking for? see Night 7 (disambiguation).
The Custom Night is the seventh and final playable night of Five Nights at Freddy's. It allows the player to change the difficulty of the animatronics' A.I. to any number that they wish, ranging from 0 to 20. It is unlocked after beating Night 6. After completing this night, the player will receive a pink termination slip.
Mechanics[]
The player is given the ability to set the difficulty level (A.I.) of each animatronic, excluding Golden Freddy. The player can set the difficulty to any number between 0 and 20, for a total of 21 possible level settings. Setting the A.I. level for each animatronic higher will increase its difficulty.
Gameplay[]
Depending on the settings the player chooses, the animatronics will act differently. The higher the A.I. (artificial intelligence) is set, the more active and tougher the animatronics will be.
Level 0[]
- Setting any animatronic to Level 0 will almost completely disable them during the night. Bonnie and Chica will only move from the Show Stage at the later hours, Freddy Fazbear never moves (with the exception of when the player runs out of power), and Foxy will almost never appear in Pirate Cove. (He will only do so if the player is extremely inactive.)
- Note, however, that Freddy will always come for the player if the power goes out, regardless of his difficulty setting. The only way to survive if the power goes out is if the clock rolls over to 6 AM before Freddy's tune ends or before he attacks.
Freddy Fazbear[]
- Despite his settings, Freddy is the least active of the four animatronics on every level. On a similar note, Bonnie and Chica MUST ALWAYS move from the show stage before he does, as he will not move until they do. On levels 1 - 2, he is extremely inactive. Having him on these settings will significantly reduce the player's chances of dying from him. On levels 3 - 6, he will become more active and start to behave more like he does on Nights 5 and 6.
- On levels 7 - 12, he will become very active. On levels 13 - 20, Freddy is at his most active and will strike at almost any chance he gets in. The player can avoid him by shutting the right door every time they pull up the Monitor or by keeping the camera on the East Hall Corner and closing the right door when the player wants to check other cameras.
- As listed above, no matter the difficulty, Freddy will always be the one to greet the player if they run out of power. Also, no matter the setting, the length of Freddy's jingle and how long he waits before and after it is played is completely up to chance. In addition, his jingle itself might be longer (its maximum time is 20 seconds). Also, contrary to popular belief, not moving while Freddy is doing his jingle will not increase the amount of time he takes to do his jingle. It is simply up to random chance.
Freddy Fazbear's AI[]
- Every 302 ticks (each tick is approximately 0.01 seconds) the game will pick a random number between 1 and 20. If it is less than Freddy's AI, Freddy will be set to Might move. When he is set to Might move, a timer will be started. Every tick it is increased by 1. If it is greater than or equal to 1000 subtracted by Freddy's AI level multiplied by 100, Freddy will move. This timer is always set to 0 if the player has the monitor up, except if Freddy is at the East Hall Corner. Note that if Freddy's AI is higher than 10, the timer will always be at 0, resulting in him immediately moving when the monitor is lowered.
- It is unclear if Freddy will ever go back from being set to Might move or Will move.
- Freddy will move through the following order: Show Stage, Dining Area, Restrooms, Kitchen, East Hall, East Hall Corner. When he has reached the East Hall Corner, Freddy will stop moving until the monitor is up and viewing a camera other than East Hall Corner. When Freddy moves from East Hall Corner, he will either move to the Office or back to the East Hall depending on if the right door is closed or not.
- If Freddy is set to higher than 10 AI, he will always move when the monitor is lowered if the player has had it up for 3-6 seconds. If he's set to 20 he will always move if the cameras are up for more than 3 seconds.
- Freddy's AI levels throughout the nights are as following: 0, 0, 1, 1 or 2, 3, 4. His AI level on Night 4 is randomized to be either 1 or 2.
- His AI will stay the same throughout the whole night, unlike the other animatonics.
Bonnie and Chica[]
- Both Bonnie and Chica have similar behaviors. Assuming they're at the same level, Bonnie will always be more active than Chica, as his AI not only increases by 1 at 3AM and 4AM, but also on 2AM. On levels 1 - 2, they will act as they did on Night 2. On levels 3 - 6, they will appear more frequently.
- On levels 7 - 12, they will appear much more frequently. On levels 13 - 20, they will appear very frequently and will be much more adept at disabling the doors and lights. At Level 20, it can be assumed that they have almost the same frequency of appearing, and the time they give to close the door has significantly dropped.
- If the player sees Bonnie or Chica in their blind spot at A.I. 20, the player will only have one or two seconds to put the door down before they come in and disable the lights and doors.
- The AI levels for Chica in each night are as following: 0, 1, 5, 4, 7, 12. Her AI will increase by 1 when the clock hits 3AM and 4AM.
- The AI levels for Bonnie in each night are as following: 0, 3, 0, 2, 5, 10. (Bonnie's AI on night 3 is likely 0 to prevent Freddy from leaving Show Stage until at least 2AM.) Bonnie's AI will increase by 1 when the clock hits 2AM, 3AM and 4AM.
Bonnie and Chica's AI[]
- Every 497 ticks, the game picks a random number between 1 and 20. If this number is less than or equal to Bonnie's AI level, he will move. Chica works the same, but every 498 ticks instead.
- The location where they go to is also randomized. Bonnie can sometimes "skip" a camera, for example he can move directly from Backstage to West Hall. Chica cannot do this, which could be why she usually is set to higher AI than Bonnie.
- The following is where Bonnie will go:
- Show Stage: Backstage or Dining Area
- Dining Area: Backstage or West Hall
- Backstage: Dining Area or West Hall
- West Hall: Supply Closet or West Hall Corner
- Supply Closet: Outside Left door or West Hall
- West Hall Corner: Supply Closet or Outside Left Door
- Outside Left door: Inside Office or Dining Area depending on whether the door is closed or not.
- The following is where Chica will go:
- Show Stage: Always Dining Area
- Dining Area: Restrooms or Kitchen
- Restrooms: Kitchen or East Hall
- Kitchen: Restrooms or East Hall
- East Hall: Dining Area or East Hall Corner
- East Hall Corner: Outside Right door or East Hall
- Outside Right Door: Inside Office or Dining Area depending on whether the door is closed or not.
Foxy[]
- Foxy's difficulty level will determine his frequency of appearing, as well as how adept he is at attacking the player and how fast he will reappear in Pirate Cove. On levels 1 - 2, he will act as he does on Night 1 and Night 2 and can be viewed as much as possible or as little as possible.
- On levels 3 - 6, he will assume his Night 3 mechanics, meaning that the player must now increase the frequency of viewing the cameras. On levels 7 - 12, Foxy will appear in Pirate Cove more quickly and attack more frequently. On levels 13 - 20, Foxy will attack much more frequently and will appear/reappear in Pirate Cove much faster. On Level 20, Foxy can reappear in Pirate Cove almost instantly after having attacked.
- Foxy's AI levels for each night are as following: 0, 1, 2, 6, 5, 6. His AI will increase by 1 on 3AM and 4AM.
Foxy's AI[]
- Foxy works unlike the other animatronics. He doesn't move around the Office, but instead progresses through different stages. In the first 3 stages he is in pirate cove, and then on Stage 4 he is in the West Hall.
- Every 501 ticks, the game will pick a random number between 1 and 20. If this number is less than or equal to Foxy's AI level, he will move. However, there is also a timer preventing him from moving. When the monitor is lowered, it is randomized between 50 and 1050 ticks. As long as the timer is greater than 0, Foxy can't move. This also means that he can't move at all when the monitor is up. However, if he has reached Stage 4, this does not apply, as he will go to his running animation as soon as the player switches to the West Hall camera. Foxy will also go directly to attack if the player hasn't triggered the animation yet after 1500 ticks has passed since he hit Stage 4.
Completing the Custom Night[]
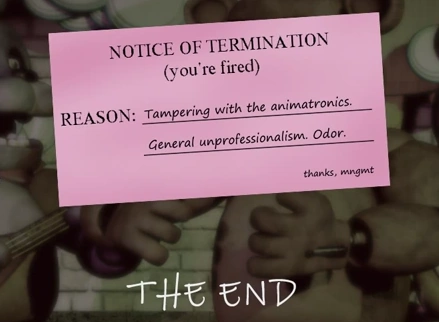
Mike's termination notice.
Upon completion of the Custom Night, the player will receive a "Notice of Termination," stating that they were fired. They are fired for Tampering with the animatronics (adjusting the A.I. levels to be easier/harder), General unprofessionalism, and Odor.
Special Input Codes[]
There are currently three special codes that the player can input on the A.I. difficulty screen.
0/0/0/0[]
Contrary to popular belief, setting all A.I. difficulty levels to zero will not disable all four animatronics. However, this mode is perfect for finding hidden Easter eggs or noting changes within Freddy Fazbear's Pizza as the night ticks on. Although the player can be caught off guard by Bonnie and Chica in the later hours, this is highly infrequent.
Triggering Golden Freddy remains a possibility, and of course, running out of power will result in Freddy coming to put an end to the player's night, unless the night ends before that occurs. Foxy can activate even when his A.I. is set to 0, although the likelihood of him attacking is incredibly low. As a result, it would be wise to keep tabs on Pirate Cove even when playing on this mode.
20/20/20/20[]
Nicknamed "4/20 Mode" or "Nightmare Mode" by the community, this is the most difficult setting in the game. All of the animatronics are extremely active, and survival is extremely difficult. Scott Cawthon, the creator of the game, hinted numerous times that this game mode is close to impossible.
If the player manages to survive, they will unlock the third and final star on the main menu. Scott expressed his shock and congratulations towards Twitch gamer BigBugz and YouTuber Markiplier when they were able to complete the mode, which he had previously considered impossible - in fact, until he realized it could be done, there was no reward for beating this mode.
Strategy[]
Below is the strategy that gives a guaranteed completion of 20/20/20/20.
- Open the Monitor and immediately go to the East Hall Corner.
- Constantly flip up the monitor whilst scrolling to the doors to check if Bonnie or Chica are waiting outside.
(Note: Rapidly flipping up the monitors automatically satisfies Foxy meaning that the player does not need to check on him. It is highly likely that the power will run out at 5:AM using this strategy if Bonnie and Chica don't wait outside the Office for extended periods of time.)
The main pattern for this strategy is check light, camera, check light, camera. This will guarantee Freddy does not move and will slow down Foxy. Even though it will slow down Foxy, there is a high chance he will still attack, most likely at 4 AM. If you want to check Pirate's Cove, you must close the right door. Failing to do this will result in Freddy entering your office and ending your run.
It's important to note that, given that they're all at an AI Level of 20, every animatronic will always succeed their movement opportunities, meaning most of the RNG in when they will move is removed. However, in the case of all except Foxy, to what room they move to when they succeed is still RNG based, meaning how quickly they arrive at the Office can still vary.
1/9/8/7[]
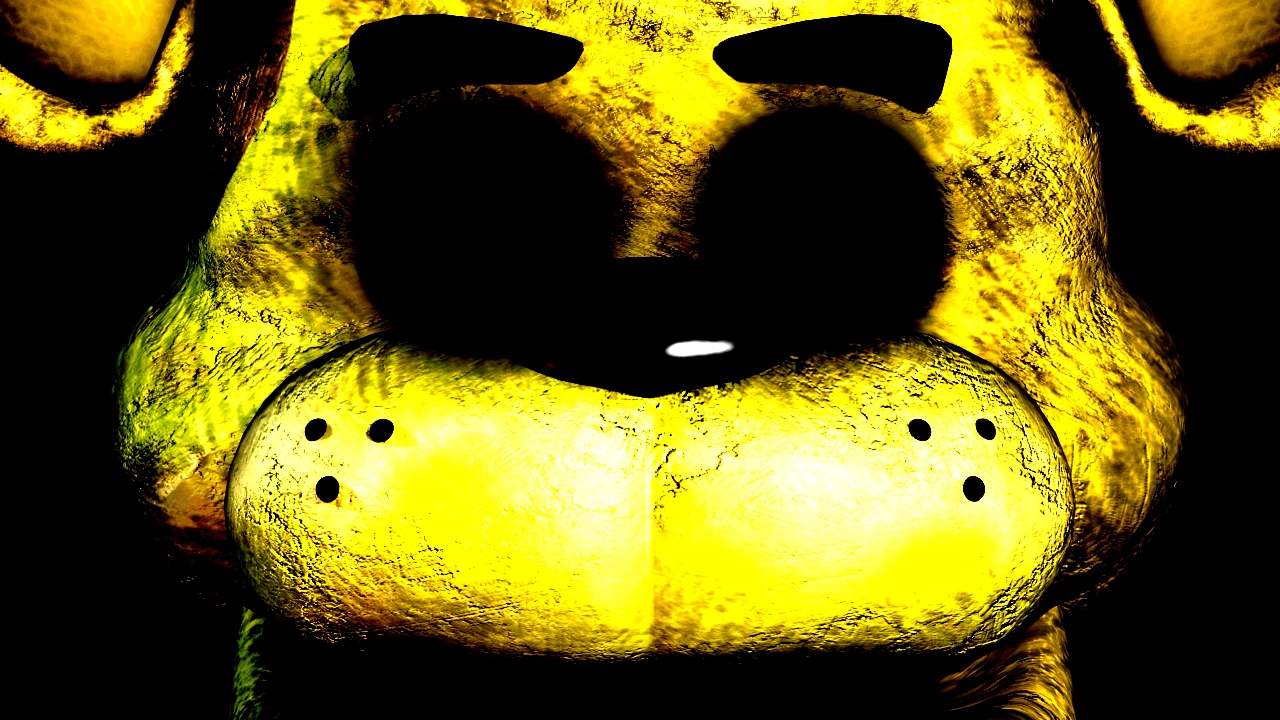
Golden Freddy's kill screen.
As of version 1.13, it is currently impossible to play the Custom Night with this setting. Entering this code will instantly trigger Golden Freddy's kill screen, which will then close the game. This was added by Scott Cawthon to cease false rumors about entering 1/9/8/7 (a reference to The Bite of '87) into the difficulty settings to get an alternate ending.
Tips[]
- The most commonly used tactic for beating 20/20/20/20 is to only check Pirate Cove on the cameras. Begin by checking the left door's light (to see if Bonnie is there), then check the right door light (to see if Chica is there), before closing the right door and pulling up the camera, only checking on Pirate Cove very briefly. Rinse and repeat. If Foxy is gone, immediately close the left door and wait for Foxy to bang on the door. Once the banging sound occurs, re-open the left door and repeat the process, only keeping both doors shut if both Bonnie and Chica are there. Failing to close the right door before bringing up the Monitor or going out of sequence will most likely result in a Freddy attack.
- Another, less common tactic used for beating 20/20/20/20 is to only check the East Hall Corner. It has been observed that Pirate Cove itself does not need to be viewed in order to stall Foxy - as long as the Monitor is in use, he will stay in Pirate Cove. This means that only checking the East Hall Corner will keep Foxy at bay while also allowing the Monitor to be raised without closing the door, because Freddy is already being viewed. The player can then simply check the East Hall Corner, before lowering the Monitor and checking the hall lights, and repeating this throughout the night. If the night is well into 5 AM, the power is at about 3 to 5%, and Freddy plays his longer jingle at the end, the player has a high chance of completing the night.
- The player can also combine these strategies, by checking the East Hall Corner very frequently (in which case shutting the right door is not required) and to check Pirate Cove only casually (in which case the right door must be closed), while, of course, checking the lights for Bonnie or Chica and closing the doors if they are present.
- Regardless of which strategy is used, a helpful tip to completing 20/20/20/20 is to save a little power by closing the right door and checking the camera immediately after. Even if the player does not see it shut all the way, as long as the button is clicked and the door is not disabled, Freddy won't enter the room. If done throughout the whole night, this alone can save up to 2-3% power, as opposed to waiting to witness the door completely close.
- Additionally, it is recommended that the player shouldn't use the Monitor, turn on lights, or close the doors with only 5-4% power left. This can potentially stretch out the remaining time, if the player is lucky enough to not get attacked by Freddy or Foxy.
- As a final tip, it is recommended that in the hardest modes, the player should only check Pirate Cove to know when Foxy is set to attack. He will be active regardless of whether he's watched "too much" or "too little." The player should also check cameras quickly. A quick rhythm to check only the fewest cameras in the shortest amount of time is recommended. If Foxy bangs on the door more than twice during the night, it would be wise to restart (because he drains more and more power each time he bangs on the door).
- The player will be able to tell when Freddy is moving by when his laughter sounds, so the player does not need to close the right door until they hear him laughing, which can save power.
- The player can also combine these strategies, by checking the East Hall Corner very frequently (in which case shutting the right door is not required) and to check Pirate Cove only casually (in which case the right door must be closed), while, of course, checking the lights for Bonnie or Chica and closing the doors if they are present.
- If the player wants a higher chance of beating this mode, it is recommended that these power milestones are hit at certain hours, otherwise the player will need to pray that Freddy does his jingle for the most amount of time possible.
- 80% or above by 1 AM
- 65% or above by 2 AM
- 50% or above by 3 AM
- 30% or above by 4 AM (or 35%)
- Between 10%-15% by 5 AM.
Trivia[]
- Unless all the characters' A.I. are set to 20, beating the Custom Night will not give the player a third star.
- This Custom Night and the Custom Night from the PC version of FNAF 2 are the only ones in which the player can choose each animatronic's AI. The mobile version of FNAF 2 and Sister Location are restricted to presets, while the 3rd and 4th game technically don't have a Custom Night.
- As of August 21, 2014, YouTubers BigBugz and Markiplier were the first to be confirmed to complete 20/20/20/20 mode, which was initially thought impossible even by creator Scott Cawthon. Bigbugz's video, which was the first to show it was possible, can be seen here. Markiplier's, which explains the strategy, can be found here. Other people have completed this mode since then, but their names will not be listed here.
- Scott Cawthon commented on BigBugz' video, stating that BigBugz' completion of 20/20/20/20 difficulty is the reason he added the third star.
- There was a rumor that entering 0/6/6/6 or 6/6/6/6 would enable the Kitchen camera. This has been proven false, as no image files exist in the game for the Kitchen.
- There was also a rumor stating that entering 2/0/1/5 into the Custom Night settings will unlock an easter egg for Five Nights at Freddy's 2. This has been proven false.
- In addition, Five Nights at Freddy's 2 was actually released in 2014.
- Upon unlocking the Custom Night, the default A.I. settings are 1/3/3/1, which doesn't appear to follow the settings of any of the nights, but it is closest to Night 2.
- Mike will still be fired for tampering with the animatronics even if the player does not touch these settings in any way.
- Scott Cawthon stated that the reason for 4/20 Mode lacking a special ending is because he thought it was impossible.
- A strategy to beat 20/20/20/20 without losing all of the player's power has been discovered. A video showing the strategy can be found here (DEFUNCT LINK).
- In the A.I. customization image of Foxy, he still appears damaged, possibly meaning that Foxy's photo was taken after he got shut down, or that he was already damaged before. The in-universe reason for this is unexplained, but the most likely reason in reality is that Scott didn't want to make a brand-new Foxy model just for a photo.
- If all A.I. levels besides Foxy are set to 0, and Foxy is set to 20, with the left door closed for the entire night, Foxy will drain all of the power with his banging in about 3 minutes and 5 seconds.
- If Freddy's A.I level is set to 20 while Bonnie and Chica's are both set to 0, Freddy will be forced to remain on the stage until the later hours, as he can't leave until both Bonnie and Chica have gone from the stage.
- In the mobile versions, there are no difficulty specifications for the A.I. levels listed. This is likely because of the screen not being big enough to display the numbers on it.
- There are a total of 194,481 configurations of A.I. levels - 21 levels per animatronic, and including 1/9/8/7, which is unplayable due to the Golden Freddy easter egg.
- The custom night AI equivalent to each night are as following:
- Night 1: 0-0-0-0
- Night 2: 0-3-1-1
- Night 3: 1-0-5-2
- Night 4: 1-2-4-6 or 2-2-4-6 (Freddy's AI is randomized between 1 or 2)
- Night 5: 3-5-7-5
- Night 6: 4-10-12-6
- Note that Bonnie's AI is increased on 2AM, 3AM and 4AM. Chica's and Foxy's AI levels are increased only on 3AM and 4AM.
- The full AI table is the following:
| Night | Time | 
|

|

|

|
|---|---|---|---|---|---|
| 1 | 12AM | 0 | 0 | 0 | 0 |
| 1 | 2AM | 0 | 1 | 0 | 0 |
| 1 | 3AM | 0 | 2 | 1 | 1 |
| 1 | 4AM | 0 | 3 | 2 | 2 |
| 2 | 12AM | 0 | 3 | 1 | 1 |
| 2 | 2AM | 0 | 4 | 1 | 1 |
| 2 | 3AM | 0 | 5 | 2 | 2 |
| 2 | 4AM | 0 | 6 | 3 | 3 |
| 3 | 12AM | 1 | 0 | 5 | 2 |
| 3 | 2AM | 1 | 1 | 5 | 2 |
| 3 | 3AM | 1 | 2 | 6 | 3 |
| 3 | 4AM | 1 | 3 | 7 | 4 |
| 4 | 12AM | 1 or 2 | 2 | 4 | 6 |
| 4 | 2AM | same | 3 | 4 | 6 |
| 4 | 3AM | same | 4 | 5 | 7 |
| 4 | 4AM | same | 5 | 6 | 8 |
| 5 | 12AM | 3 | 5 | 7 | 5 |
| 5 | 2AM | 3 | 6 | 7 | 5 |
| 5 | 3AM | 3 | 7 | 8 | 6 |
| 5 | 4AM | 3 | 8 | 9 | 7 |
| 6 | 12AM | 4 | 10 | 12 | 6 |
| 6 | 2AM | 4 | 11 | 12 | 6 |
| 6 | 3AM | 4 | 12 | 13 | 7 |
| 6 | 4AM | 4 | 13 | 14 | 8 |
The reason the AI is different depending on the time is because Bonnie's AI increased by 1 at 2AM, 3AM and 4AM. Chica and Foxy's AI increase by 1 only on 3AM and 4AM.
Freddy's AI on Night 4 is randomized between 1 and 2